The Always-Updated Beginner’s Guide to Building Your Own Gaming PC
The In-Depth Resource for PC Building Beginners
BGC makes learning how to plan and build a gaming computer from scratch easily understandable – even if you have no prior hardware experience
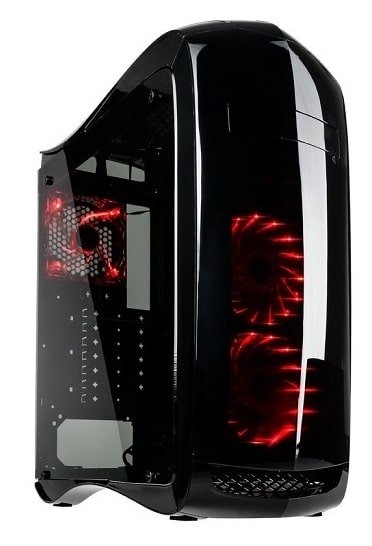
Welcome to BGC where our mission is giving you all the detailed, updated information you need to confidently build your own gaming computers from scratch – even if you’re a complete beginner who’s never seen the inside of a PC before.
When getting a new computer to experience PC gaming in all its graphical glory, if you want to get the smoothest performance and highest graphics quality for your money to maximize your experience (and to avoid lame lag getting in the way of the fun), building a custom gaming PC yourself is the smartest way and has many advantages over buying a prebuilt desktop.
Need Motivation? Great Reasons Why You Should Build a PC
When you learn how to build gaming computers, you’ll not only stretch your money further and get the fastest performance for your budget (meaning higher frame rates and better graphics), but you’ll also be able to include more reliable, higher-quality parts that will allow your system to run as smooth, cool and quiet as possible – for as long as possible.
Plus, when you build a gaming PC it will be WAY easier to upgrade or maintain your machine, as you’ll have full flexibility and control from the very start which means you can easily tweak it over the years however you see fit (and without encountering issues). For example, some prebuilt PCs are quite limited in the upgrades you can do, and some manufacturers even void your warranty if you simply open up the computer case.
Furthermore, building a gaming computer means you can specifically choose the right parts to fully maximize performance in the specific games/applications you care about most. Last but definitely not least, building a gaming PC yourself also means you can select the exact style, theme and features that you really want, to end up with your dream computer. The bottom line? Buying a prebuilt desktop, while convenient for those who are really impatient or strapped for time, just cannot compare to the many upsides of building your own.
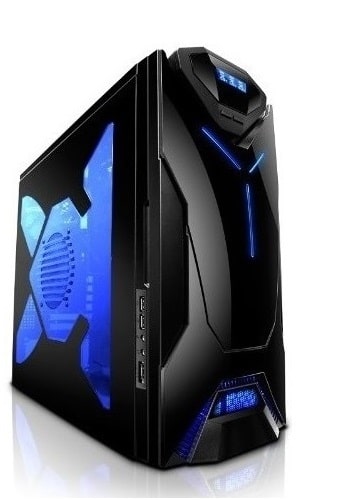
But the Best Thing About Building a PC?
You might have heard that building your own gaming computer is super straightforward and essentially just like Lego but for grown-ups. Well, the great thing is – it’s true. All of it. In modern times, building a gaming computer really is as easy as people often say on forums and elsewhere online. It’s genuinely hard to mess up if you simply learn a bit about the components you’ll need (see below), pick a good list of compatible parts based on your budget and preferences (using build guides such as our monthly gaming PC builds as a base of reference), and then simply follow a step by step tutorial to install your PC parts and software.
There’s really nothing overly-complicated or technical about learning how to build a gaming PC for the first time, and we say that objectively and not just because we run a site on PC building. If you think about it, hardware manufacturers want installation of their parts to be as straightforward to do as possible (so more people buy their products). PC parts are designed to be as effortless to work with as possible.
Avoiding damage to your parts is also as simple as following a few basic safety precautions such as not touching the delicate bits, keeping parts in their anti-static bags until installation, taking things slow, and regularly “grounding” yourself to avoid static electricity (by touching a metal object before handling parts or wearing an anti-static strap). Let’s get straight into the basics of planning your first build.
Introduction to Building a Gaming PC
The 5-Step Simplified Guide for Hardware Beginners
As mentioned, planning and building your own gaming desktop computer is a remarkably easy process considering how complex it may sound to some random stranger on the street who doesn’t realize there’s nothing crazy-complicated or overly-technical about it. However, as straightforward as it is to build a computer in the modern PC age, you’ll still need an introductory step-by-step guide to follow along with as a first-timer.
Otherwise it’s all too easy to get lost in research land of doom, as while there’s lots of info around the web on custom PCs, the reality is it’s scattered all over the place on different sites, videos, forums, etc. As a first-timer you could spend an eternity trying to learn and piece together the information you need.
Plus, the manuals that come with your parts don’t provide the necessary installation explanations you require as a beginner. Component manuals can include diagrams and important details regarding installation (so don’t throw them out!) but they lack the full instructions that you need to understand every step.
Just Want Component Recommendations? See the Gaming PC Builds Tier List
Any questions or concerns you might have right now about building a PC will likely be covered at some point in the walkthrough below. So, if you’re a bit overwhelmed that perhaps YOU can’t build your own PC and that’s it’s too complicated (it really isn’t), just have trust that you absolutely can despite having no prior hardware experience, and just keep moving through one step at a time at your own pace and everything will start to make sense.
Thanos-Sized Tools Optional
With absolutely ALL the steps required to build a PC clearly explained below, you’re in the right hands – many first-time PC builders have used our guides over the years to overcome their fears and end up confidently assembling the custom gaming PC of their dreams. Will you be next? Good luck, enjoy the quest, and may the force be with you and your parts. Building your first computer is a memorable, rewarding experience, and you’ll feel a real sense of accomplishment and satisfaction every time you boot up your new system knowing that YOU made it all happen and are in full control.
So, in our quest to make building your first gaming PC as easy and frustration-free as possible, we’ve carefully-crafted the below simple-yet-comprehensive 5-step guide on how to build a gaming computer from scratch, with the assumption that you know nothing Jon Snow. This fine-tuned guide has been tweaked over many years to make the process as easy as possible as a beginner (and to include all the burning questions that beginners commonly ask us), and we will cover all the basics you need to know all in the one place (and using as simple language as possible without complicated tech jargon/lingo you’ll often see in other hardware articles/guides).
Step 1: Understand the Required Hardware Parts
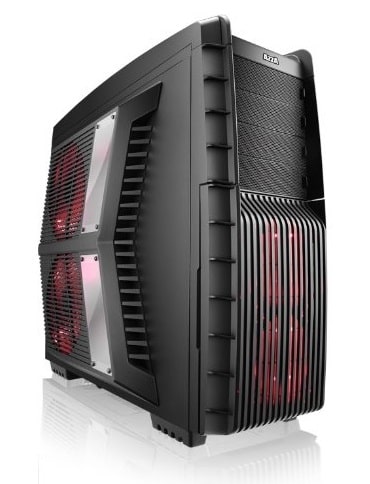
Parts Needed to Build a Gaming PC
For your new gaming battlestation of glory to be fully-operational once construction is complete, the following are the essential parts you will need to buy when building your own gaming computer:
- CPU/Processor
- CPU Cooler (most CPUs come with one)
- Motherboard
- RAM/Memory
- Graphics Card (or CPU with integrated graphics)
- Storage Drive (HDD or SSD or both)
- Power Supply
- Case
- Operating System Software (like Windows)
- Peripherals (Monitor, Mouse, Keyboard, Audio)
Everything else is optional for a computer build, as there are a whole bunch of other additional add-on parts and accessories that you could include in your custom setup either from the very start or later on as an upgrade. But the basic parts above are what’s 100% required to construct a new working PC that you can start gaming on straight away.
Let’s take a quick look at the main role of each of these parts, including links to our detailed hardware selection guides should you want to learn about a particular component in more detail (including what all the spec and features mean). But keep in mind that to build a PC you don’t need to thoroughly understand all the hardware parts n too much detail, and a basic understanding is sufficient to get started on planning your build (so feel free to skip ahead to step 2 if you already know a little about hardware).
CPU/Processor
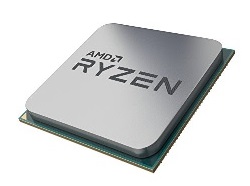
Also called the processor, the CPU (Central Processing Unit) is a fairly small, square-shaped component that sits on your motherboard and is responsible for all the lightning-speed mathematical calculations required by the games and software you run.
You’ll want a good CPU when building a gaming PC, as its importance to gaming performance is second only to your graphics card. See our full guide to choosing the best CPU for gaming to get up to speed with what all the CPU features mean and which specs are most important, or see our latest sample gaming PC builds which include breakdowns of the current best value gaming CPUs and why.
CPU Cooler
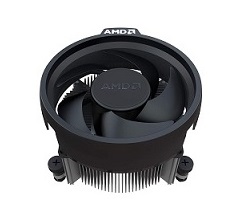
Also referred to as the HSF (Heatsink and Fan), this is what sits on top of the actual CPU to keep it cool and quiet. Most CPUs will already come shipped with a cooler in the box, so chances are you won’t need to buy one when building a computer, though when building a high-end gaming computer you’ll want to consider replacing the stock cooler with a better one for more effective cooling and noise reduction.
Buying your own CPU cooler is especially important if you want to overclock your gaming PC as stock CPU coolers aren’t designed for overclocking, though you should probably avoid overclocking if you’re brand new and just building your first PC. When you buy your own cooler, you have the choice of an air cooler or a fancier liquid cooler, though a good air cooler can be just as effective (if not more in certain configurations) than a liquid one.
Motherboard
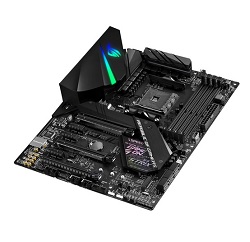
If your CPU is the brain of your computer, the motherboard is the heart and central nervous system which acts as the center of your build, as well as transferring information between all of the components in the system.
Whilst it doesn’t directly affect the performance or frame rate of your games, the motherboard is an important component and when you build a gaming computer you want to find a decent one that has the features that you need, the upgrade flexibility that you want, and that is from a good, trusted manufacturer. If you need to know the full details of selecting the right Mothership for your battlestation don’t miss our complete guide to choosing the best motherboard for a gaming PC.
RAM/Memory
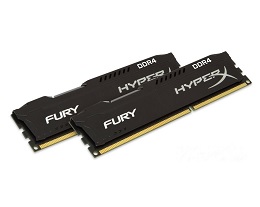
RAM (Random Access Memory) comes in the form of horizontal memory modules/sticks that you slot into the motherboard, and is the memory in your computer that running programs and games rely on during their operation.
Generally speaking, the more RAM you have in your system, the faster your programs and games will run, although for gaming there is a point where more RAM isn’t going to noticeably increase performance. As of 2019, 8GB-16GB is enough to maximize gaming performance.
Graphics Card
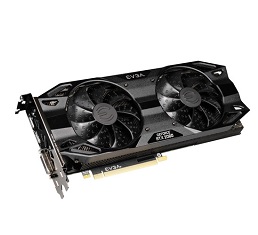
The star of any worthy gaming system, the graphics card (also called a video card or GPU, short for Graphics Processing Unit) is responsible for calculating and rendering the 3D graphics and special effects to your monitor. Your choice of graphics card plays the biggest role in how well your gaming PC will perform (ie how smoothly and high-quality your games will run) and without a decent one in your parts-list you won’t be able to view your games at their best.
Therefore, you should allocate a healthy chunk of your overall budget to your graphics card to maximize the gaming performance of your new rig (more on this in part 3 below). See how to choose the best video card for gaming to delve deeper into what GPU specs and features mean.
Storage Drive (HDD or SSD or both)
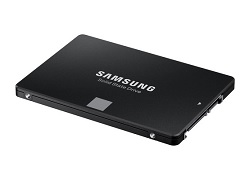
For your gaming computer build you’ll need some sort of storage capacity to be able to load the operating system and games on, and there are various devices you can use for this with the most common being either an internal HDD (Hard Disk Drive) if you’re on a budget, an internal SSD (Solid State Drive) for faster performance, or a combination of both a HDD and a SSD (where you’d use the SSD as the main drive for your operating system and a handful of programs, and the HDD for all your other files). There’s no need to worry about getting a huge amount of storage upfront, as you can always add internal or external drives later on. See choosing a SSD for more.
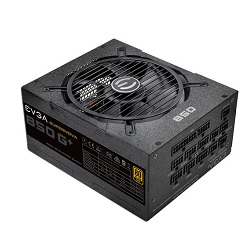
Power Supply
Commonly referred to as simply the PSU (Power Supply Unit), the power supply is a box that sits inside your case (usually on the bottom) and provides the power for your system from your main wall socket in your house. When beginners learn how to build a gaming computer for the first time, it’s often an overlooked component and that makes sense because how important can a power supply really be, right?
But hold it right there – when you build a gaming PC this is a common rookie mistake to avoid at all costs (simply buying the cheapest PSU you can find), as it may come back to bite you later on as cheap PSUs spell trouble. If a power supply dies, there’s the risk of it frying and killing your other parts in the process, so you could say your new custom gaming computer is only as strong as its weakest link.
A bad PSU is a liability, and you can re-word that to HUGE liability if you’re building a powerful, more high-end PC. Choose a good power supply for your PC build that will last the distance, has decent efficiency (80+ Bronze minimum), and that provides enough power for your particular parts-list (and future upgrades).
Case
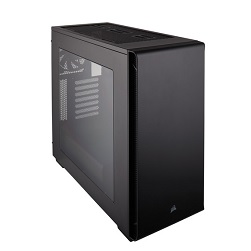
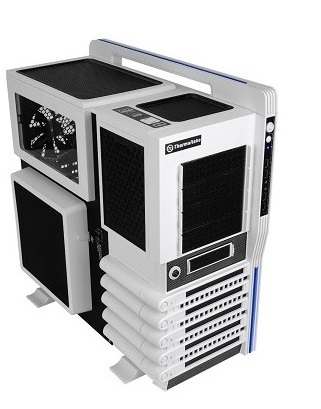
Last but definitely not least in terms of the core hardware components that make up your PC tower, the case (sometimes called the chassis if you want to get fancy) which will house all your precious parts, provide airflow to your system with a bunch of fans and grills, and which is obviously responsible for how your awesome new gaming computer will look from the outside.
Will you choose a sleeper low-key look for your new custom gaming PC, or more of an in-your-face aggressive all-RGB beauty with see-through side panels? Perhaps something in-between? There’s a vast array of cases out there to suit any taste, and you can see some of our current favorites in our guide to choosing a case for a gaming PC build.
Operating System Software
There are a gazillion software programs you can install on your PC, but there’s only one that is 100% non-negotiable, and that of course is an operating system. Windows is the most popular choice for gaming, with Windows 10 being the latest and greatest and what we’d recommend if you’re building your first custom gaming PC. Linux is your other option, but it’s more technical and will require a lot more work to get started with.
Peripherals
The above are the core parts you’ll need when you build a gaming computer, but to make a working new computer that is also ready to play games from the get, you’ll need a couple extra things. Without things like a monitor or mouse, your new PC will just be a hopeless heap of hardware that sits there twiddling its thumbs in boredom.
- Monitor – Without a screen to actually view the beautiful graphics that your graphics card renders, your new PC is essentially one big expensive box of useless parts. But not all screens are created equal, and they can vary greatly in price, features, sizes and resolutions. Picking the right monitor for gaming is an artform of which we distill as simply as we can in our constantly-updated buying guide. How to Choose the Best Gaming Monitor
- Mouse – The mouse is another peripheral required for a new gaming computer build to actually be use-able from the get, and to some gamers it’s an important part of the overall gaming experience as not all mice are created equal when it comes to gaming. Depending on how seriously you take your gaming, and how much you’re willing to invest in a quality comfortable model that lasts, you’ll want to put at least a little thought in the mouse you choose as they can vary greatly in size, weight, features, feel, and responsiveness. How to Choose the Best Gaming Mouse
- Keyboard – For a new PC to work you will also obviously need a keyboard, any some gamers will do just fine getting a budget, low-cost keyboard that just gets the job one. Others will want to invest in a higher-quality, more comfortable and/or freature-rich keyboard, such as one with high-quality keys, extra programmable macro buttons, and/or cool LED backlighting. How to Choose the Best Gaming Keyboard
- Audio – Music and sound effects can play a huge part in your favorite games so you don’t want to neglect your setup’s audio capabilities, especially if you want the best gaming experience. You have various options here, including getting a set of external speakers, picking a monitor with built-in speakers (most aren’t too good though), or finding a nice gaming headset (or gaming headphones if you don’t need a mic). Choosing Gaming Speakers
Step 2: Choosing the Right Budget for Your Needs

How Much is it to Build a Good Gaming PC?
You may wonder how much it costs to build a computer for a good gaming experience, but the answer completely depends on your specific wants and needs. What makes a good experience is subjective, and things like the types of games you play, the resolution you’ll be gaming in, and the performance level (ie frame rate) you’d be satisfied with will differ from gamer to gamer. Let’s talk about it.
When building your own custom computer you’re only limited by your budget and imagination, and you have the option to build a very cheap gaming PC for a few hundred bucks, or to fork out a few thousand on a high-end monster of a machine (and everything in-between). If you’re strapped for cash though, the good news is you can still build a good gaming computer on a budget (and for much cheaper than you may realize) and end up with an enjoyable experience. Not everyone needs to run the latest, most graphically-demanding AAA games in super-high resolution and at super-high frame rates to have a blast.
The biggest factor at play for most gamers when choosing how much you should spend on a gaming PC build is the screen resolution you will be gaming in. Higher resolutions than the standard 1080p (like 1440p and 4K) will demand quite a bit more firepower from your system if you want a smooth experience, and if you’re a picky gamer who wants to play at the highest graphics quality settings and/or you’re using a monitor with a higher-than-average refresh rate and wish to get higher-than-average frame rates to take advantage of that refresh rate, you’ll need even more power.
Let’s look at a few different price points and which resolutions/applications are ideally suited for that amount.
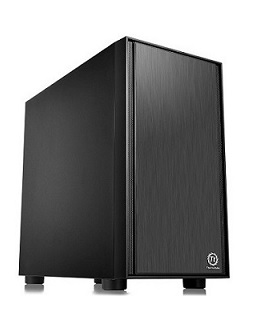
Under $500 (Entry-Level Modern Gaming)
With a spending of amount of 500 dollars and under you’ll be quite restricted, but the truth is with smart component choices you can still build a first gaming PC that will play modern titles in the standard 1080p resolution with very playable performance (depending on the game though and how much you turn down the graphics settings).
A build in this price point may be all you need though if you’re just mainly sticking to older, less demanding games, or you don’t mind turning down the graphic settings considerable and/or you don’t mind the occasional slow-down/lag here or there in the more demanding titles.
Many popular eSports titles have much lower demands and can perform really well on a real cheap setup. Obviously you can’t expect much in terms of peripherals and accessories in this tier either, but some gamers honestly don’t mind using a basic, generic mouse, keyboard and monitor that simply gets the job done.
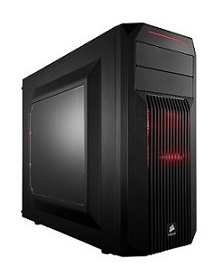
$500 to $1000 (The Mainstream Mid-Range)
The best value PC gaming resolution right now is 1080p (also called Full HD), and building a PC between 500 to 1000 dollars will allow you to achieve good performance at this resolution (and the closer to $1000, the closer to perfect performance you’ll get).
This price range also allows for a decent 1440p gaming computer, which is the next resolution up in quality from 1080p and will make for an even more immersive experience. You could say this price point is the overall sweet spot in terms of striking a nice balance between your gaming experience and your cash outlay, and if you’re wanting the very best 1080p gaming PC possible then $800 to $1000 is more than enough.
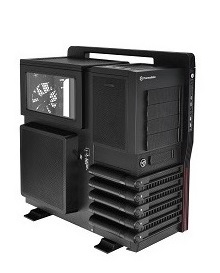
$1000 to $2000 (High-End Gaming)
Now we start getting into very high performance for the gamers who demand more such as flawless 1440p gaming on high/ultra settings or high refresh rate gaming for 144Hz monitors. A build between 1000 to 2000 dollars will also get you good virtual reality and 4K gaming performance.
Pro creators, producers, game streamers, and/or artists performing demanding non-gaming tasks such as high-end video editing, game development or 3D rendering/animation should also be eyeing off this type of budget (or even higher if you’re a true professional wanting to leave no stone unturned when it comes to productivity).
$2000 and Beyond (Ultimate Performance)
Now we get into serious power, and building your own desktop in this price range is for gamers seeking the very best gaming experience that money can buy, with little to no compromises. In other words, if you’re either rocking a 4K monitor and want to take full advantage, you’re aiming for 144FPS+ to take full advantage of a 1080p/1440p 144Hz monitor (or even 240Hz; yes, this craziness does exist), or if you’re delving into the deeply exciting rabbit hole that is VR and want the best experience – throwing down a couple grand or more on an extreme gaming computer may be a worthy investment for the experience of a lifetime. Just don’t forget to put the VR headset down every once in a while to breath the fresh air of reality, as in 2019 it’s legit addictive as hell and only getting better and better.
Step 3: Plan the Perfect Parts-List for Your Budget
Always-Updated Example PC Builds
It’s time for perhaps the most fun part of building a gaming PC – planning, tweaking and perfecting an awesome list of matching, compatible components for your budget, performance aims, and specific preferences. To help you pinpoint exactly where the current best value parts are within the market as a gamer, our constantly-updated Best Gaming PC Builds for the Money series is here to help and has been the go-to, most-popular part of the site since first kicking off the series quite a long time ago.
Every quarter we do the meticulous, painstaking research in coming up with the very best gaming desktop build examples that we possibly can based on over a decade of build design experience, all the way from a super bang-for-buck $300 entry-level setup for casual gaming to a monster $5000 all-RGB rig of glory with all the bells and whistles (and every build budget in-between).
Our gaming PC build guides explain how to choose the fastest, best value parts on the market as a gamer
Allocating Your Budget for Maximum Gaming Performance
If you’re tweaking a build or designing your own parts-list from the ground up, don’t forget that the two most important parts as gamers are the video card and CPU. You should allocate a nice chunk of your overall budget towards these two, and it’s a good idea to base your parts-list around them.
Graphics Card: 25-40% of Total Build Budget
To build the best gaming PC for your money, you’ll want to invest a minimum of 25% of your total build budget on the graphics card, as nothing is more important to gaming performance. So for instance, for a gaming computer build around 1000 dollars you’re looking at a graphics card around $250 to $400 to max performance. Going higher than $400 or so will mean having to make too many sacrifices on your other parts, and less than 25% means you’re not allocating enough of your budget to graphics and leaving gaming performance on the table like many prebuilt PCs do.
CPU: 15-25% of Total Build Budget
The second most important component when building your own custom gaming computer, so look to also spend a healthy portion of your budget on the fastest one you can get. Using a $1000 system as an example again, throwing $150 to $250 on the CPU is about the right balance. Remember this is just a general guideline, and also this is for gamers wanting the fastest gaming performance; if you’re building a workstation PC or hybrid gaming/workstation PC, consider throwing a bit more at a better CPU.
The reason we single out the graphics card and CPU is because, as mentioned in step 1, these are the two most important parts in a gaming PC. You should probably think about choosing these parts first when planning your build, assuming you want to maximize gaming performance. Picking a graphics card around 30-40% of your total budget (and 15-25% for a CPU) is a good ballpark to aim for that will allow you to include the best graphics card you possibly can in your rig, which will lead to the best gaming performance. For anyone wondering, yes bottlenecking is possible (which happens when your CPU is too weak in correlation with your graphics), but for most builds these ratios will work well and you won’t experience bottlenecking.
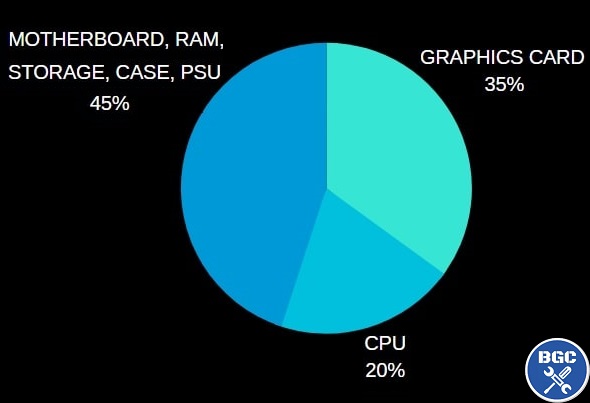
Our general philosophy on balancing a build for the fastest gaming performance
Performance Perfectionist? Aiming for Specific FPS Targets
If you follow the general guidelines above, or study how we allocate different spending budgets in our best PC builds for gaming series, you’ll end up with a very good performing gaming PC for your budget (we also provide estimated FPS numbers in all our build guides).
But if you want to take things further and guarantee that your new system will get the frame rate that you want in a certain game at a certain resolution (and settings), then you’ll want to do some further research and look into benchmarks around the web to confirm you’ll get the performance you’re after with the parts that you decide to buy. We also have specific game performance guides for popular eSports in our main menu which can save you time. Also, if you’re building a PC for virtual reality we’ve got you covered with our in-depth guide for that too.
Planning a Hybrid Gaming and Workstation PC Build
As well as predicting the performance your parts-list will get in the games that matter to you, if you’re building a hybrid gaming and workstation system for other demanding tasks for work, you’ll need to take your particular programs and workflow into account when planning your build too. For example, you might want to allocate more money to the CPU and/or RAM if you care just as much about video editing, 3D production and/or streaming as you do about gaming performance. You might also see better performance going with AMD over Intel, or vice versa, depending on the specific programs you’ll be using. See our supporting guides for more on building a workstation gaming hybrid computer:
Planning Ahead for Upgrades (RAM, CPU, GPU, etc)
This should go without saying when you’re learning how to build your own gaming PC, and when you plan your parts-list around a well thought-out example build like our own builds this has already naturally been taken into account, but if you’re planning a parts-list from scratch (or tweaking an existing build from someone else) then always consider the upgrade path. Let’s cover a few basic examples that is good to know as a beginner.
First and foremost, with RAM being one of the most common upgrades you can make to a gaming PC (as it’s quite inexpensive yet brings a nice little boost in overall performance), as a rule of thumb you want to always keep a couple of RAM slots free on your motherboard.
That means choosing a motherboard that has 4 RAM slots if you’re getting 2 RAM modules now (which is a good idea by the way as 2 modules usually runs faster than just the 1, even if it’s the same amount of RAM). In the chance you do pick a motherboard with only 2 slots (perhaps it’s a small form-factor one that you really like), you’ll want to consider just getting the 1 RAM module instead to keep one slot free for the future.
If you plan on swapping the graphics card for a better one in a few years time, there shouldn’t be any problem with doing that, but make sure you choose a computer power supply that will provide enough power to accommodate a more powerful card in future. Same thing goes with upgrading to a dual graphics card setup should you want to do that later on, and in that case you’ll need even more wiggle room power-wise.
Upgrading a CPU later on is also possible, but if you’re going for Intel you’re likely not going to be able to upgrade to the latest processor in a few years as you’d also need to change the motherboard too. This is where AMD has a nice advantage, as their current AM4 platform is compatible with future CPUs by doing a BIOS update, meaning if you buy an AMD CPU and motherboard today, in a few years time you can likely upgrade the CPU to the newest edition whilst keeping your same motherboard.
With Intel, you’d have to either upgrade to a faster yet older CPU (as in, the same generation that you’re buying now), otherwise you’d need to get a new motherboard if getting the latest CPU. Although to be fair on the whole AMD vs Intel debate, there’s no telling how long AMD’s AM4 platform will last.
Step 4: Confirm Compatibility & Buy Parts
If you’re using one of our recommended gaming desktop builds exactly as-is, you don’t have to worry about checking compatibility between all of your parts as we do all that for you, but if you’re tweaking one of those builds or designing your own parts-list from scratch you’ll need to do compatibility checks yourself. Although, it must be said that even if you’re using someone’s already-planned build (such as one of ours), we encourage you to confirm compatibility for yourself anyway just to be extra safe as people can mistakes.
A new gaming PC can be expensive so you want to ensure what you’re buying is completely compatible. Furthermore, as a beginner who’s building your first PC, you’ll ideally want to learn at least the basics of how to do basic compatibility checks so that you can be a smarter builder now and for the rest of your merry gaming days, and so you don’t have to rely on someone else or a tool.
Speaking of tools, a site called PCPartPicker is handy for checking basic compatibility of the parts you’re thinking of buying, but keep in mind it doesn’t check absolutely everything such as certain spacing/size issues among other things, meaning it is possible to encounter an issue if you don’t do some manual compatibility checks yourself.
But yeah, in many cases (pun intended) you could be just fine relying solely on their compatibility checks. If you want to be extra cautious to avoid compatibility issues, any experienced builder will tell you the same thing: never just rely on a tool and do your own checks to be on the safe side. Even if using a tool like PCPartPicker, if you’re new to hardware and building a gaming PC it’s always best to learn how to do compatibility checks between all of your parts yourself. It’s not hard, and you’ll be a smarter, more informed builder now and for your future builds/upgrades (once you build your first PC, you’ll never want to buy a prebuilt again).
See Also: How Accurate is PCPartPicker for Compatibility Checks?
See our individual hardware guides to learn what you need to know about choosing parts that are compatible. For example, our guide to choosing the right motherboard explains how to choose a compatible CPU and RAM for your motherboard, and you learn the important aspects of RAM compatibility with our guide on choosing computer memory and so on (see all guides here).
Buying PC Parts Online vs Offline
In 2020, Ecommerce (AKA buying online) has well and truly become the norm in most industries. Going into a physical store to buy something is nice for some people who still want to speak to someone face to face, and while nobody on Earth has the Jedi-level persuasion skills capable of convincing Grandma to start buying her socks online, for most people buying online is a no-brainer for the amazing convenience.
But it’s not just the convenience; if you want the best price on most consumer products, buying online is the best way to go 9 times out of 10 as online stores typically don’t have the overheads of brick and mortar stores, and can therefore afford to offer the most competitive price. With PC hardware, in most cases (pun intended), it’s no different. However, if you’re lucky enough to have a good brick and mortar computer store near where you live such as good old Microcenter in the US, there’s no harm seeing what they can offer (just give them a call). But in most situations, buying from a trusted, reliable, well-oiled major online store like Amazon will get you the best price possible.
Navigating Customer & Professional Reviews
When researching a particular product, reading both professional and customer reviews can come in real handy to learn more about the product and someones experiences with it if you want to dive deeper into whether a particular model is worth the money or not. Whilst still helpful, be wary when researching customer reviews and ratings (ie amateur reviews) as they can be misleading in some cases because people who have a bad experience often feel inclined to leave negative reviews, whereas those who are on their merry way with a successful component, happy as Larry Page, tend to not leave their thoughts in a positive review.
That sometimes skews the perception of certain products, where you might see many 1-2 star reviews from those who have received faulty or broken parts, and you start to think the product is a piece of junk when the reality could be it’s just fine and those unlucky customers who got a dud/lemon are the exception and not the norm. Don’t get me wrong though, certain products are definitely more prone to fault and DOA (dead on arrival) issues, so if you see a lot of bad ratings it potentially is a bad buy, but don’t take things at face value too quickly in this industry.
If you want to research reviews, lean more towards trusted, credible sources such as top hardware sites like TechSpot, TomsHardware, AnandTech just to name a few. However, customer reviews from sites like Amazon and PCPartPicker can still be very helpful so long as you put your thinking cap on whilst reading, don’t get too caught up in any one person’s opinion as it can be tough discerning between who actually knows what they’re talking about (and giving an accurate representation of a product), and who might just be speaking random, inaccurate nonsense just because they had a bad experience.
It should go without saying, but always base your purchase decisions off multiple sources and not just from that one guy who said “Product worked (for me). Therefore, must be greatest, most amazing product in galaxy. If you don’t buy this, you’re a lower lifeform. 5 stars”. By the same token, don’t necessarily lose all hope in a product after one gal rages “Product didn’t work (for me). Worst product on planet. Obviously made by Jawas in back of Sandcrawler. Nobody on Earth should buy, ever. Boycott company or you’re a bad person”.
Should You Buy All Parts at the Same Time?
You most definitely can slowly piece together a build part by part over time, but if you’re a beginner you’re probably best off buying all the core components of your new system at (or around) the same time. Why? A couple reasons:
1. Some parts will have a limited time frame in which you can return them for a replacement in the odd case that they are defective. If you buy one part at a time, you can’t know for sure if a certain part is working perfectly before you have all of your parts together. So if you get unlucky and receive a faulty part, and you find this out a few months or even later when you finally get around to building your PC, you may not be able to return or swap it.
2. Another reason to favor buying all the PC parts for your build around the same time is that as times goes on new parts will obviously come out, and it’s possible that if you then buy a newer part in future to use with the older parts that you purchased previously, you might encounter compatibility issues. This is both quite uncommon, nad avoidable if you know what you’re doing, but it has happened before to beginners so it’s worth mentioning. An example would be buying a motherboard now, then waiting a few months to buy a new CPU and failing to realize that it’s not compatible with your older motherboard.
When Building a PC What Should You Buy First?
If you are slowly piecing together your build one part at a time, perhaps because you don’t have enough money to buy all your parts in one go, you may wonder which component/s you should buy first. It’s a good question, but there’s no hard or fast rule and will depend on various factors. But a good starting point is to base your build around your CPU and graphics card, and then go from there, because these are of course the most important parts. But you could also choose/buy your case first, and then go from there. It really is down to personal preference.
Cutting Costs to Build a Cheaper PC
If you’re on a tight budget or just looking to assemble the most cost-effective rig that you possibly can (no matter what price point), there’s a host of various things you can do. If that sounds like you, don’t miss our complete guide on this which covers everything from the glaringly obvious ways to save money on a build down to the less obvious ninja hacks and tricks. We told you were you in good hands here at BGC and we weren’t kidding around, so enjoy and hope it helps:
17 Tips and Tricks to Save Money on Your PC Build
Step 5: Assembling Your Gaming Computer
So you’ve planned a well thought-out, fully-compatible list of good-quality, reliable parts to get the performance you want in the games and/or applications you’ll use. You’ve also ordered them all and are ready for the moment of truth to finally construct your epic new battlestation of gaming glory. Fear not, as the installation process really isn’t difficult if you have all the steps laid out for you in an easy to follow manner. Speaking of which, you didn’t think we’d leave you hanging on that now did ya?
Our comprehensive yet easy to follow guide to building a PC was carefully-crafted with complete beginners in mind, and includes all the important little details and detailed explanations you need to get through your first custom gaming computer build with ease:
How to Assemble a PC from Scratch (Step by Step for Beginners)
Our gaming PC build tutorial covers installing all your parts in detail (minus the jargon)
Once a Builder, Always a Builder
That wraps our introduction to planning and building a gaming computer for beginners, and we hope this roadmap helps you on your way to a smooth, hassle-free first gaming PC build. When you’ve finished building your first custom PC, it’s going to be hard ever going back to buying a prebuilt system ever again. You’ve seen behind the curtain, beyond the wall, through the matrix, and [insert witty pun here] – there’s no going back now! Good luck, gamer.
Search the Site
Trusted VPN
VPNs are fast becoming must-have software these days to improve the security and privacy of your PC when online. There’s lots of VPNs but NordVPN is objectively one of the best and the one I use. VPNs also help for online gaming as explained here.
About Me
Indie programmer currently working on my first game release (after years of hobby projects), an atmospheric story-driven VR FPS/adventure built with Unreal Engine to be announced once I’m ready here and here (for anyone into VR FPS’s). Also likes writing about tech, which helps to fund development of the game.
My favs of all time are OOT, Perfect Dark, MGS1, MGS2, GE007, DKC2, THPS3, HL1, WC3, Vice City, and KOTOR, with the most recent addition to my list of immortals being the VR masterpiece Alyx.
If you want help with a new build or upgrade feel free to ask on the main PC builds guide. I try to respond to every comment. If you found the site real helpful and want to help support the work I do here, sharing an article with anyone you think might also benefit from it does help the site and is appreciated in advance. – Julz


