Even considering how often editors complain about how dysfunctional Premiere Pro has become it still holds its place as perhaps the most widely used NLE around for professionals and amateurs alike.
Of course, you could consider switching to another program, but that is a hassle for many reasons and on some projects you may be at the whims of your post-production team or the client even.
Since you may be sticking with Premiere it may be possible to fix some of those annoyances. Coming from Premiere Basics is another set of tips that details five annoying bugs and how to fix them.
1. Zoom In on Keyframes
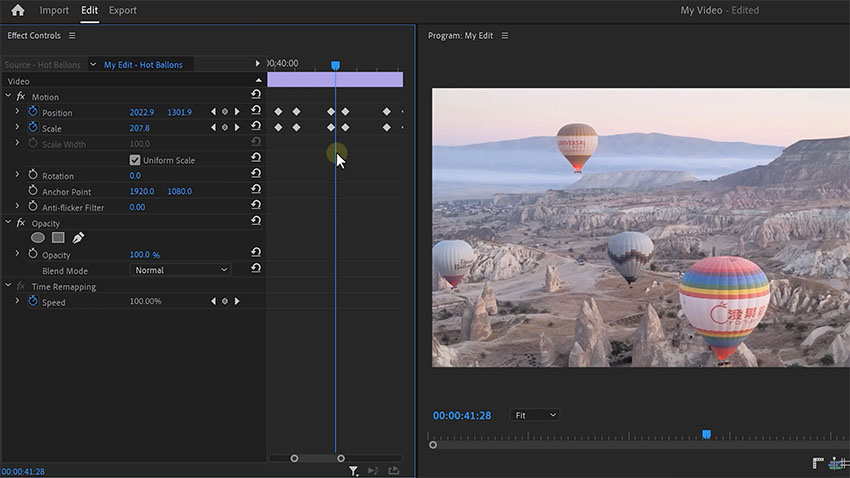
Sometimes you may find that you can no longer zoom in on your keyframes in the Effect Controls panel. This can be a problem as if you have enough they start overlapping and become impossible to control.
This one fortunately has a simple fix.

Image Credit: Premiere Basics
Expand the options menu of the Effect Controls panel and make sure the Pin to Clip option is disabled. You should be able to adjust keyframes now.
Sometimes this just gets toggled on for no reason.
To speed up toggling this setting on and off you can set up a keyboard shortcut. Head to the Edit tab and hit Keyboard Shortcuts.
Now you can find the Pin to Clip property and set a physical shortcut for it.
2. Playback Monitor Goes Black
Another bug that can be frustrating is when you hit play and the monitor just stays black. There are some potential quick fixes.
Switch between different playback resolutions for example. It might just return without much hassle.

Image Credit: Premiere Basics
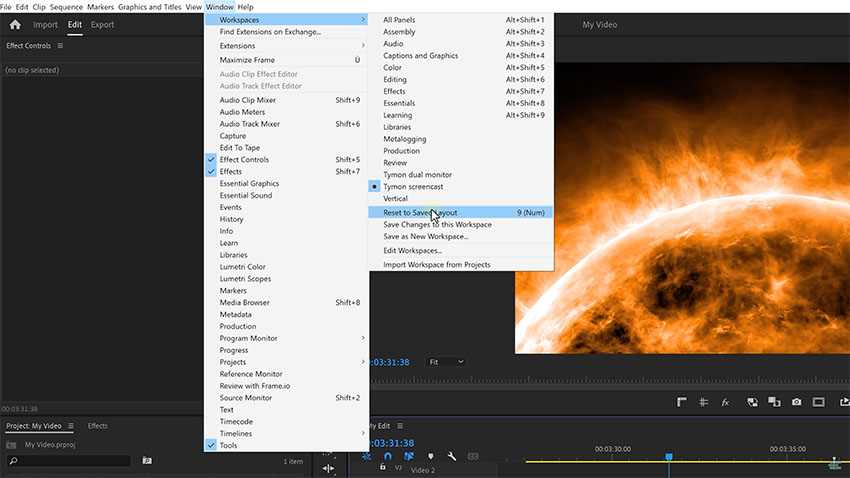
If that doesn’t work you’ll need to reset your workspace. Heading to the Workspace tab you then head into Workspaces > Reset to Saved Layout. This can be set as a shortcut.
3. Export Doesn’t Look Like the Project
One near-constant issue is that exports don’t look like what you were looking at in Premiere. This fix is heading into a few settings.
In the Edit menu, go and open up your Preferences to General. Find the Display Color Management check box and enable it.

Image Credit: Premiere Basics
This should make sure that Premiere displays your image similar to how other programs will render it.
Next, you’ll want to download the gamma compensation LUT from the Adobe website.
With that LUT you can head to your export tab in the Effects area and use this LUT during export. This should fix the gamma issues you have been experiencing.
4. Audio Waveforms Not Showing
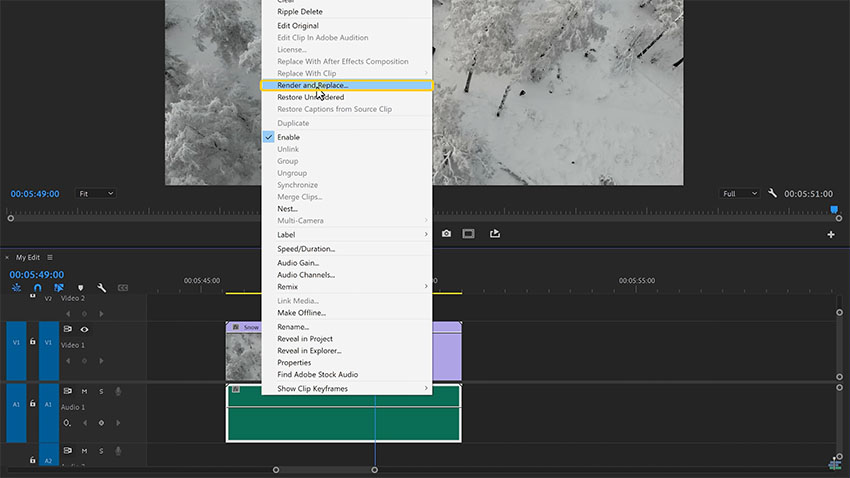
Sometimes you’ll bring in a new clip and it just won’t show your audio waveforms. Quickly what you should do is hold Alt and select your audio to only select the audio. Right-click and then select Render and Replace.
This will render the audio and forces Premiere to reload the waveform.

Image Credit: Premiere Basics
5. Nesting All Audio Clips
For some reason, you can’t just select all your audio clips and nest them.
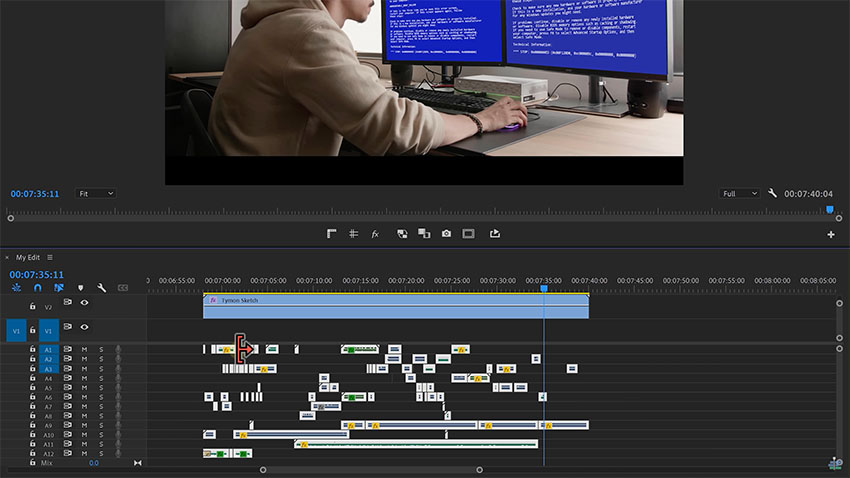
To pull this off you can create an adjustment layer over all your audio and then select that clip along with all your audio. This should be able to be nested as normal.

Image Credit: Premiere Basics
Now you can just delete all your clips, find the nested sequence, and bring it into your timeline as normal. You can delete the video track to clean it up even more.
That’s all they have for today, but I’m sure at least one will be useful to any Premiere editors out there.
[source: Premiere Basics]
Order Links:


